Creating and understanding scenes
Adding Scene To Workspace
Note: since Editor v4.4.0 the way to create new scenes changed. It is highly recommanded to update to to at least this version.
By default, a newly created workspace contains one scene. Per workspace, it is possible to manage multiple scenes in order to, for example, split levels of a game.
A newly created scene is always empty and ready to receive new assets etc.
Creating A New Scene
To create a new scene in the workspace, just go to the Assets Browser panel and select Add -> Scene....
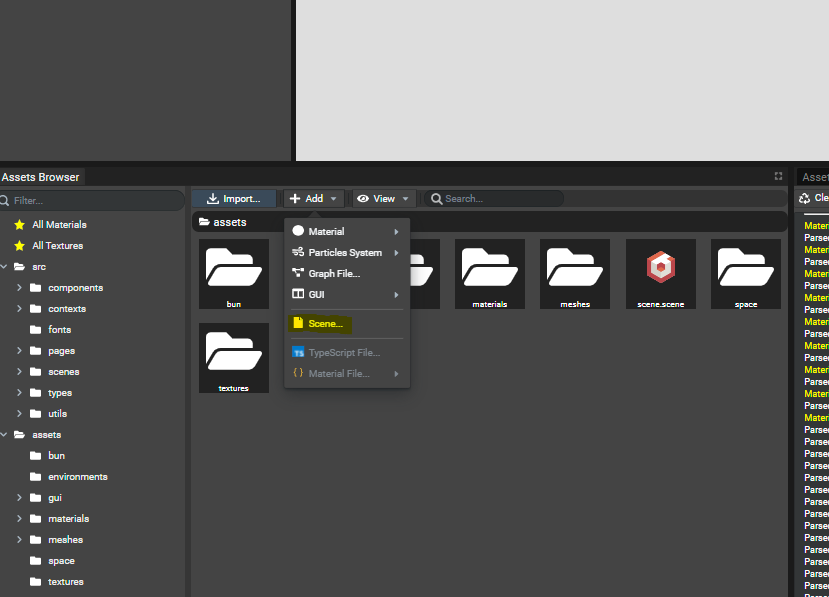
Once clicked, a popin appears to ask for the name of the scene. Once the button Finish is clicked,
the new scene is being created on the file system. Then, the Editor will ask to continue working
on the current scene or load the new one.
Once a scene has been created, a new folder located at "workspacePath/projects/sceneName" is created containing
all the resources of the scene. Once the new scene is loaded and generated, a new folder located at "workspacePath/scenes/sceneName" is created.