Babylon Utilities - Showroom Camera
Related links: source, demo, NPM listing, PrivJs listing.
High Level Overview
Once upon a time, I was looking at the usage of 3D in e-commerce websites when I began to notice a pattern: while the 3D models being rendered were often diverse and exciting, the camera movements in these experiences tended to be very, very simplistic. Wondering about this, I speculated that the reason for the simplicity (with each experience usually either having only arc-rotate or still camera behavior) is because writing camera control code is something of a niche specialization, and not every 3D e-commerce site has the resources to invest in it. This got me wondering whether there was some common basis of behaviors that could be encapsulated in a Babylon Utility that many e-commerce sites could use to make their 3D cameras more exciting. After deciding that there was such a subset, I finally reached the biggest question: how would I develop a Babylon Utility so that it could be distributed, and perhaps even sold, for use by other people in their own projects?

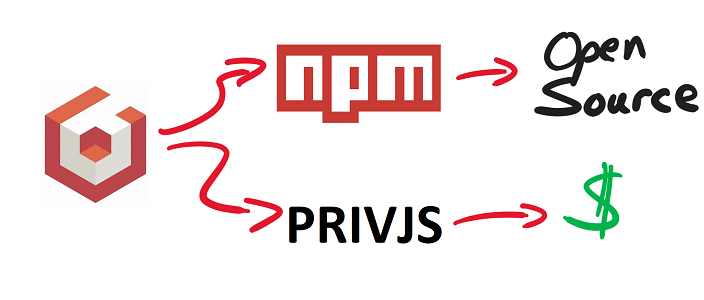
Commercial 3D engines tend to provide commercial solutions to this problem; the Unity Asset Store, for example, is Unity's solution. As a fully free and open-source engine, Babylon.js doesn't have that kind of infrastructure. However, I soon found that, by leveraging other existing open-source infrastructure (particularly built around NPM), I could achieve exactly the same goal whereby I could give, and even sell, the ability for other developers to quickly and easily add my Babylon Utility into their own projects.
- First, I created my new repository, leveraging the Template Repository Workflow to make it easy to redistribute later.
- I next implemented the new utility camera itself.
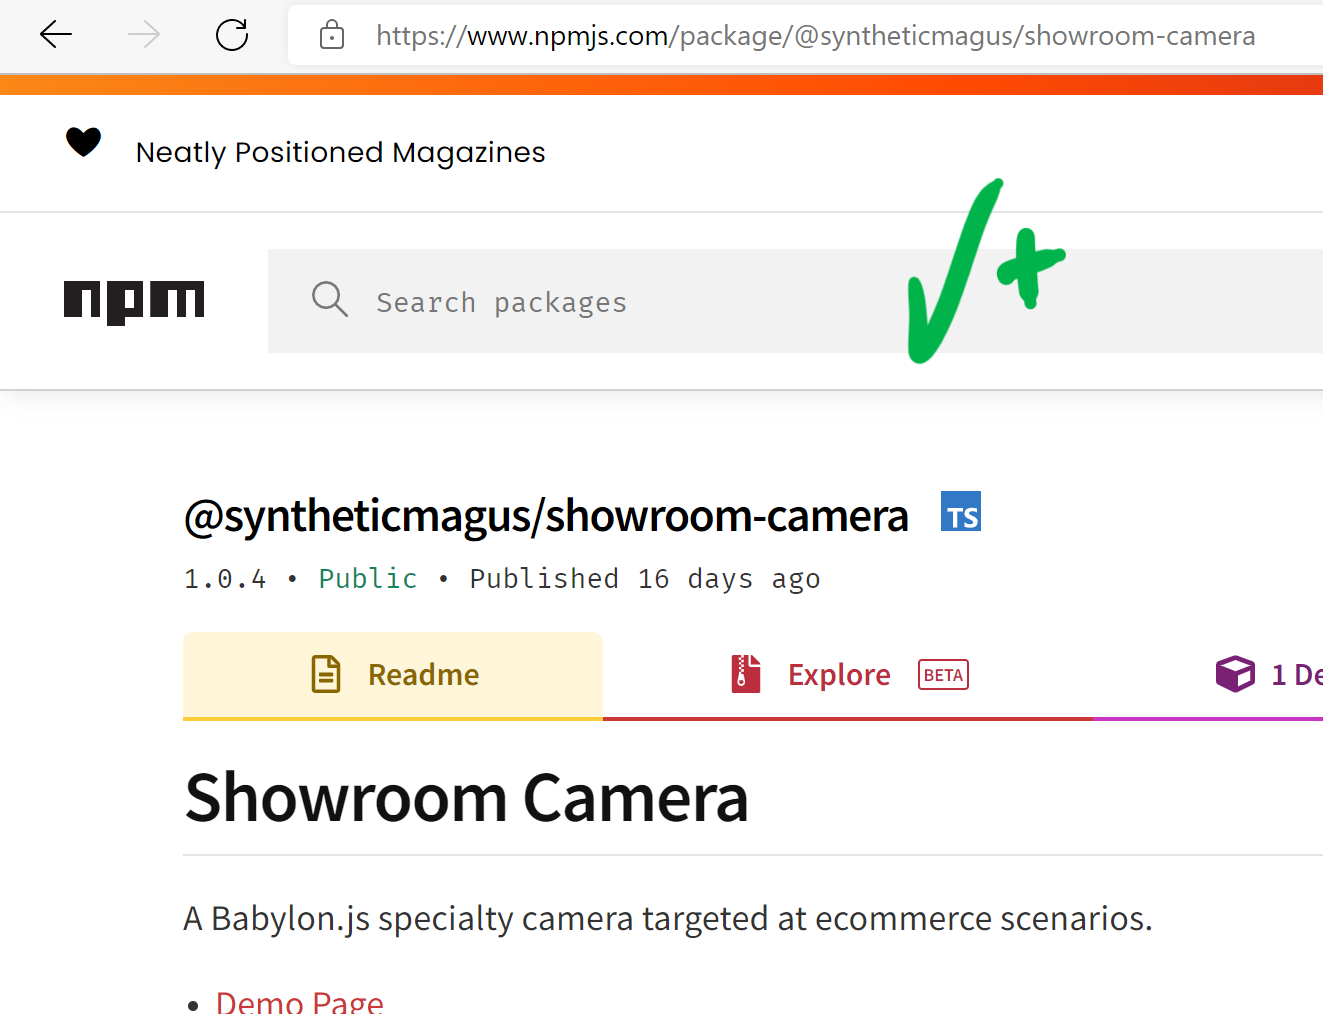
- To give away the ability for others to use my new Babylon Utility, I uploaded it as an NPM package to the main public NPM registry.
- To sell the ability for others to use my new Babylon Utility, I uploaded it as an NPM package to PrivJs, a commercial NPM registry that makes it easy to buy and sell access to NPM packages hosted there.
And that's how I created the Showroom Camera, a Babylon Utility that adds a specialized camera to serve needs specific to e-commerce scenarios, and made it available for other developers to use from free and/or commercial NPM registries. The actual usage of such a Utility is as simple as taking an NPM dependency; the Vaporwear company illustrates that in another Dev Story. This Dev Story is about creating the Showroom Camera Babylon Utility, so on that topic let's circle back to the beginning and proceed with...
A More Step-by-Step Journey Through the Process
Creating the Repository
Setting up a repository to develop a Babylon Utility was very similar to the process described in the Fruit Fallin' Dev Story, but with a few key differences worth elaborating on.
-
To start, I created and cloned down a new NPM package template repo following the first six steps from the first section of the Fruit Fallin Dev Story.
After that point, I deviated from that Dev Story since I wasn't porting over code that was originally in the Playground.
-
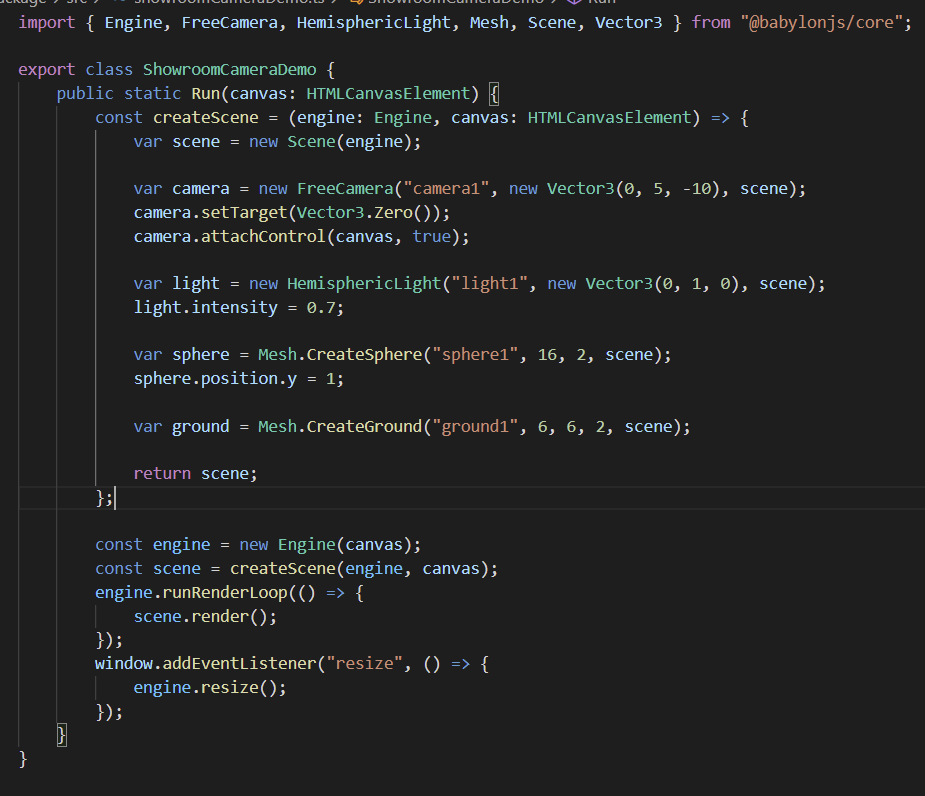
As is typically the case when bootstrapping an NPM Package Template repository, my first priority was to get rid of the playground.ts and establish the intended "shape" for the
app_package. However, since this time I was creating a Babylon Utility instead of a standalone experience, instead of creating an entry point I created a class that would contain a demo/test scene.
-
Into this scene, I moved all the code and infrastructure from playground.ts and playgroundRunner.ts (doing some light refactoring as I went), again with the goal of being able to delete those files since they were not a part of my Babylon Utility.
-
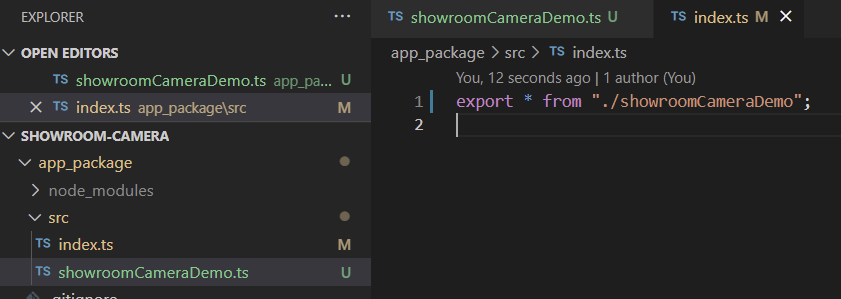
To finish this process, I changed the exports in index.ts...
-
...and modified the
test_packageto invoke my demo scene instead of the deleted playgroundRunner.ts entry point.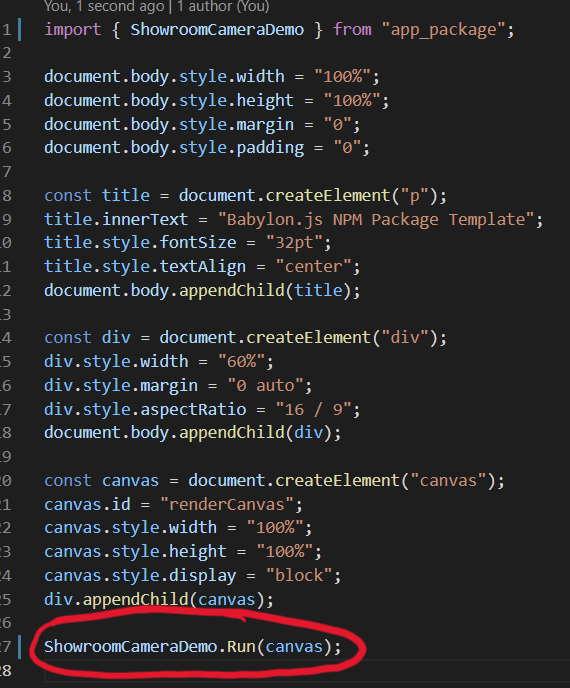
-
Finally, I ran the test app (
npm run dev) and checked to make sure my refactoring hadn't changed any behavior.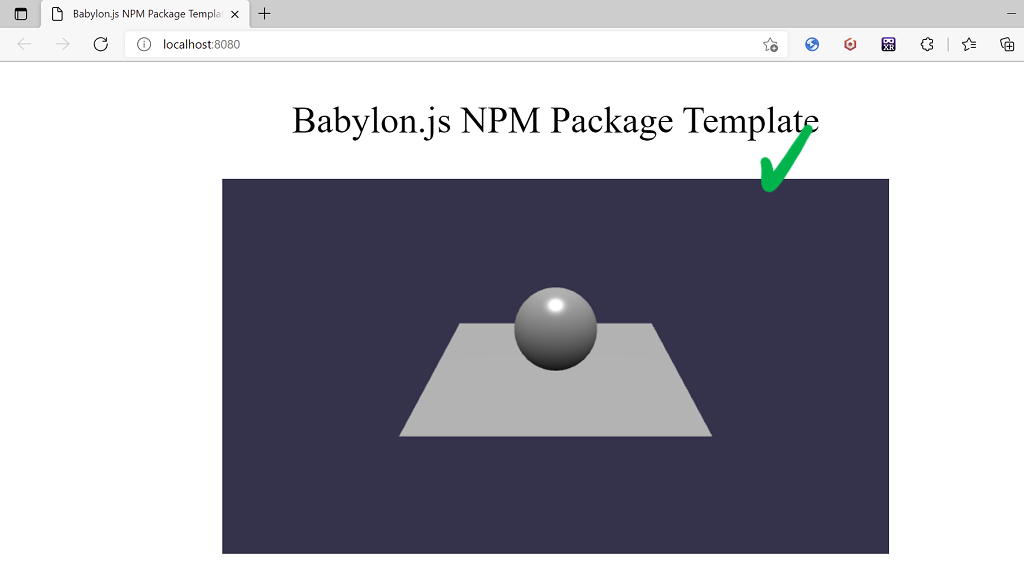
Again, this setup was simply to get my repo ready to develop a Babylon
Utility rather than a standalone experience or a Playground port. With
the infrastructure now clean and established, I was ready to add
showroomCamera.ts and begin implementing the class I intended to export
as a utility: the ShowroomCamera itself.
Implementing the ShowroomCamera
Dev Stories are not coding tutorials, and a detailed overview of the
ShowroomCamera's implementation is out of scope for this narrative.
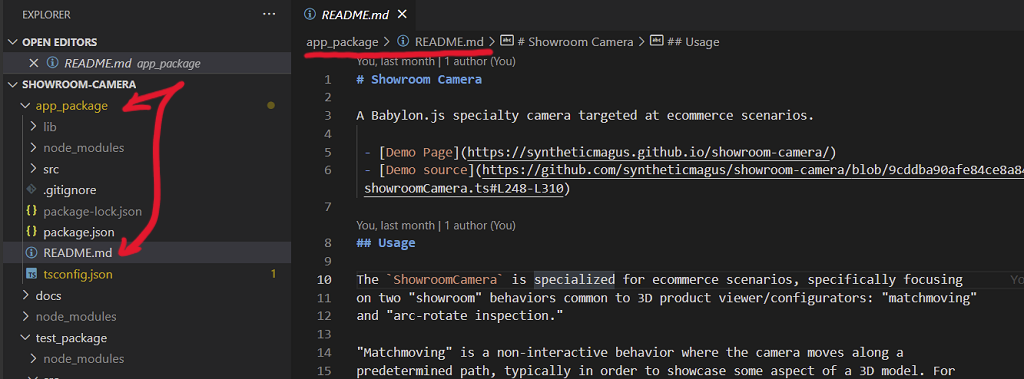
Details of the functionality are described in the
Showroom Camera's README,
and specifics of the implementation are perhaps best described in
the code itself.
(Of course, any and all questions are always welcome on
the forum!)
This section, then, will be limited to just a few high-level glimpses of
some of the more significant pieces of the implementation.
- The
ShowroomCamerahas two behaviors: it can act like anArcRotateCamera, or it can act like a "matchmoving" on-rails camera that follows a predetermined path (for example, orbiting a 3D model to show it off from all sides). Because the goal in the "arc-rotate" state is to act like anArcRotateCamera(which is a favorite camera of the Babylon.js Community), I decided the best thing to do in that mode would be to just have theShowroomCamerabe anArcRotateCamera. More precisely, theShowroomCameracontains anArcRotateCamera. That way, when theShowroomCameraenters an "arc-rotate" state, all it has to do is correctly position theArcRotateCamera, then enable it. - "Matchmoving," the second behavior of the
ShowroomCamera, is achieved by simply using a second camera which follows a user-providedTransformNode. Three aspects of this are noteworthy.- The matchmoving is done using a second camera (as opposed to
just moving the
ArcRotateCamera) so that theArcRotateCameracan remain free to position itself.ArcRotateCameras come pre-packaged with a lot of very custom behaviors, so rather than try to predict what those behaviors will do in a given circumstance (and risk taking a hard dependency on implementation details of Babylon.js), we simply use anArcRotateCamerawhen we want that behavior and a separate camera when we don't. - The choice to have the second camera follow a
TransformNodewas made in the interest of flexibility. TheShowroomCameradoesn't care how theTransformNodeis moved; all it does is use thatTransformNodeas a definition of the path it's supposed to be matchmoving, then follow along. This allows the user to move theTransformNodeany way they want to: the demo features procedural animations made with coroutines while another Dev Story makes heavy use of the ability to controlShowroomCameramatchmoving using animations crafted by a 3D artist. - Note that the second camera follows the provided
TransformNode; it actually copies its position and orientation from theTransformNodeframe-by-frame instead of, for example, setting thatTransformNodeto be its parent. This was partly done to avoid muddling the hierarchy -- theShowroomCameramay be matchmoving many differentTransformNodesat various times in the same scene -- but it was also done to resolve difficulties with handedness. For example, when using aTransformNodeactuated by an animation and imported from a glTF made with Blender, theTransformNodethe camera should be following may be in a different handedness from the scene around it, which can cause strange behaviors for cameras that are a part of that direct hierarchy. To avoid this, theShowroomCamerasimply follows the absolute position and orientation of theTransformNodein world space.
- The matchmoving is done using a second camera (as opposed to
just moving the
- The final key feature of the
ShowroomCamerais the ability to seamlessly transition between "arc-rotate" and "matchmoving" behavior using procedural animations. These procedural animations use coroutines to spread interpolation over many frames as they gradually move the camera from one state to the next. This is, by far, the most complex part of theShowroomCameracode and was the primary motivation for turning it into a Babylon Utility. - The
ShowroomCameraDemo.Run(...)function added in the prior section serves two roles. During development, this function is essentially used as a test harness where uses can be added and changed to test out the new functionality and APIs. After development, this function lives on as a demo illustrating what theShowroomCameracan do and how to use it. For larger projects with more sophisticated testing/ demo needs, a formal test battery could serve the same purposes.
Uploading to Share on npmjs.com
After I'd gotten the features and APIs I wanted in the ShowroomCamera,
publishing it to be shared through NPM was as easy as it was in
the first Dev Story that showed this.
However, there are a few noteworthy differences between the
Showroom Camera and Fruit Fallin' arising from the fact that the
latter, as a Babylon Utility, is intended for consumption by other
developers, not just my own shipping vehicles.
-
I added a README.
Note that this isn't the README in the root directory of NPM Package Template repository; that README won't be published because only the
app_packagefolder gets published. Thus, the important README for NPM publication is inapp_package, not the root. -
I updated the package.json file (again, the one in
app_package), making sure to setname,description,repository, andpublishConfig. I also modified the syntax of the dependency on@babylonjs/coreto make it easier for projects depending onShowroomCamera, which will presumably already have their own dependencies on@babylonjs/core, to resolve versions.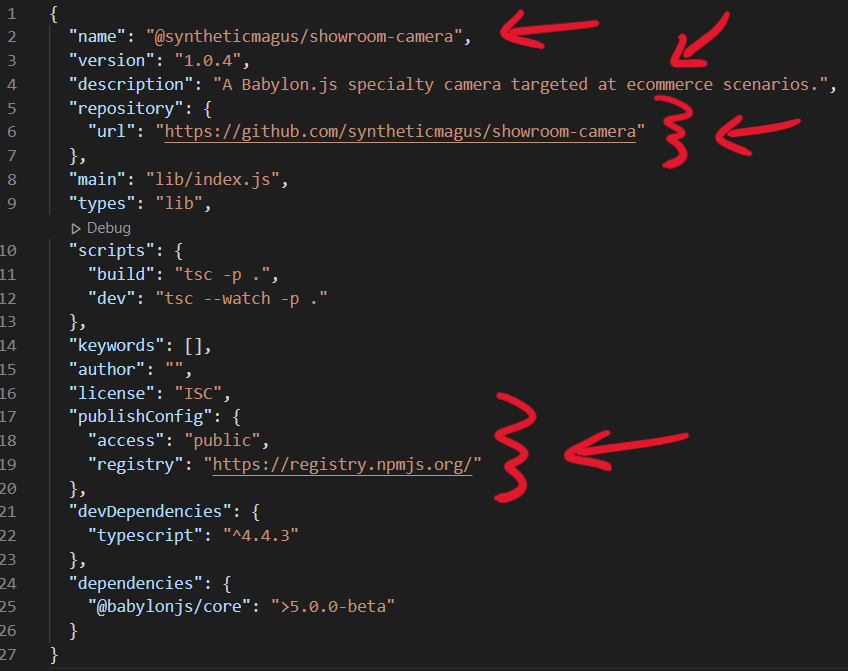
-
npm publish
Uploading to Sell on PrivJs.com
Babylon Utilities bear a lot of inherent similarities to the kinds of products bought and sold in places like the Unity Asset Store. Selling access isn't really what the default NPM registry is for; however, there are several alternatives on the market that allow developers to buy and sell access to NPM packages. I personally decided to try PrivJs, and I was pleasantly surprised to find the process very easy.
-
After signing up for a PrivJs account, I took a look at the instructions they provided for publishing an NPM package on their registry.
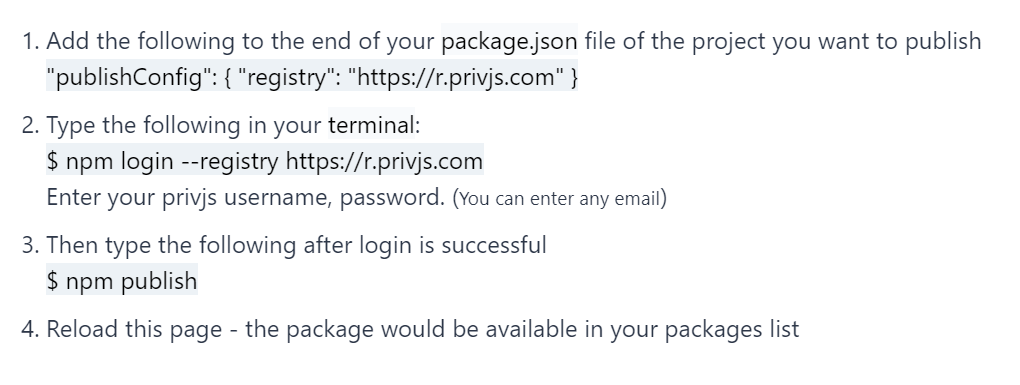
Seems simple enough.
-
I did the same things to publish on PrivJs that I did to publish on npmjs.com, with the exception that I changed the
publishConfiga bit.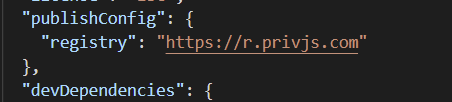
As a side-note, I also had to update my version because I had already published on npmjs.com and PrivJs, which is aware of npmjs.com, won't accept packages with conflicting versions.
-
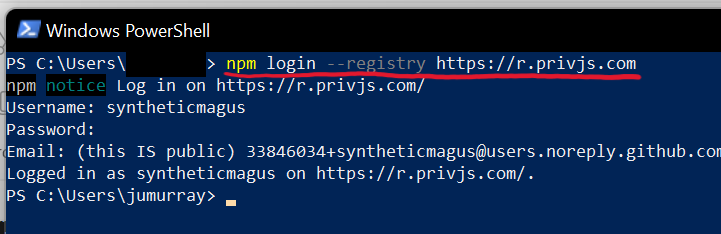
npm login --registry https://r.privjs.com
-
npm publish
-
Once your package is published on PrivJs, you can log in to configure your options as a seller. Personally, I'm pretty bad at setting prices, so it's unclear whether I'm ever going to make a profit on this.
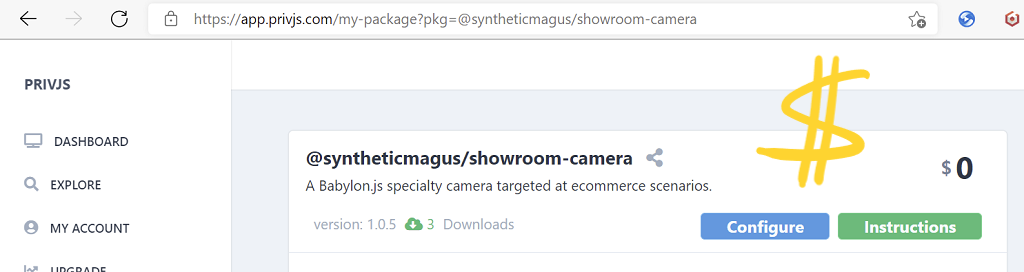
Boom! Soup.
Bear in mind that NPM package marketplaces like PrivJs are much newer than the FOSS registries like npmjs.com, so the infrastructure for commercially distributing Babylon Utilities won't be quite as mature as the infrastructure for free distribution. However, the options are there, and they're very easy to take advantage of; so whether you want to sell your Babylon Utilities or give them away for free, hopefully the process is as straightforward for you as it was for me!
And as for consuming these Babylon Utilities, that should also be just as simple as consuming any other NPM package from the registry in question. In fact, I know some people who have already done this -- some imaginary people working for an imaginary company -- but that is a topic for another Dev Story.
-syntheticmagus